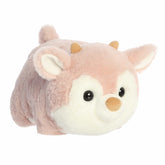
DIY Corner: How to Craft a Summertime Dress for Your Plush
Craft a Summertime Dress for Your Plush

Summer is here, and it's the perfect time to give your plush toys a stylish new look! In this DIY guide, we'll show you how to craft a beautiful summertime dress for your beloved plushie. With a few simple materials and some creativity, you can transform your plush into the best-dressed toy on the block. Let's get started!
Materials You'll Need (Parental Guidance Recommended for ages 4 & Under):
- Fabric (lightweight cotton or any summery print)
- Scissors
- Needle and thread (or a sewing machine)
- Measuring tape
- Pins
- Decorative items (buttons, ribbons, lace)

Step-by-Step Guide:
Step 1: Measure Your Plush
Start by measuring your plush toy to ensure the dress fits perfectly. Measure the height from the neck to the desired length of the dress and the width around the widest part of the body. Write these measurements down for reference.

Step 2: Cut the Fabric
Using the measurements, cut two pieces of fabric: one for the front and one for the back of the dress. Add an extra half-inch to each measurement for seam allowances. If you want a fuller skirt, cut the bottom part of the fabric wider.
Step 3: Create the Dress Shape

Lay the fabric pieces flat. For a basic dress, cut an A-line shape from the top to the bottom. Ensure the top part is narrow or large enough to fit the plush’s neck and widen towards the bottom for a flared look.
Step 4: Sew the Side Seams
Place the front and back pieces of fabric together, with the correct sides facing each other. Pin along the sides and sew from the top to the bottom edges, leaving openings for the arms.
If you're using a sewing machine, set it to a straight stitch and sew with a 1/4-inch seam allowance.

Step 5: Decorate Your Dress
Now comes the fun part! Decorate the dress with buttons, ribbons, or lace to give it a unique and summery flair. You can sew a ribbon around the waist or add a lace trim to the bottom hem.
Step 6: Try It On
Carefully dress your plush toy in its new summertime attire. Make any necessary adjustments for a perfect fit. Admire your handiwork and get ready for some compliments on your plushie's stylish new look!
Some Inspiration:
Here are some brilliant concepts brought to life to get the creative juices flowing, courtesy of the amazing @wong.__.gu on Instagram!

Tips and Tricks:
- Mix and Match: Use different fabrics and colors to create a variety of dresses for different occasions.
- Accessorize: Add a matching hat or a tiny bag to complete the summer outfit.
- Easy No-Sew Option: Use fabric glue instead of sewing for a quicker and simpler project, especially for younger crafters.
Crafting a summertime dress for your plush toy is a delightful way to spend a sunny afternoon. With this step-by-step guide, you can create a custom outfit that shows off your plushie's personality and style.
Get Crafting!
For more fun DIY projects and plushie adventures, stay tuned to our blog and share your cozy moments with Aurora's Plushies, and tag us @auroraworldus for a chance to be featured on our socials! We can't wait to see what you come up with!
What do you want to see featured in the next DIY corner, comment your answer!


